When installing bearings, cleaning, drying, (grease sealing) test operation, etc. should be carried out based on observing various precautions.
When using precision rolling bearings, to obtain the highest speed and low-temperature rise effect, the installation of the bearing is very important.
Step 1: Clean the bearings and remove the anti-rust oil
Soak in highly volatile solvents such as refined kerosene and naphthol and wash by hand, then use gasoline, ethanol, etc. to remove the refined kerosene,. When blowing off the cleaning oil with an air gun, pay attention to the cleanliness of the air.
Step 2: Dry the bearing so that no moisture remains
When using grease lubrication, to prevent grease from flowing out, the bearing needs to be fully dry.
In addition, grease should be sealed immediately after drying. It can be dried with warm air (pay attention to the cleanliness of the air) or in a constant temperature bath.
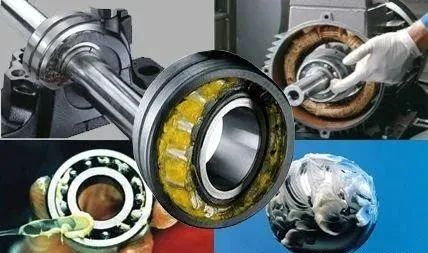
Step 3: Encapsulate the Grease
After sealing, turn the rolling part by hand to fully coat it with grease.
For ball bearings, a syringe can be used, a vinyl plastic bag can be aligned with the inner ring rolling surface, and equal amounts of grease can be packed between the balls. When there is a raceway ring guide cage, it is recommended to use a small tool such as a spatula to apply it on the guide surface of the cage. When the inner ring rolling surface cannot be sealed due to the narrow space of the inner ring, the outer ring rolling surface is sealed. At this time, try your best to rotate by hand to allow the grease to penetrate the inner ring.
When applying grease to the outer diameter surface (inner diameter surface) of a roller bearing, turn the roller with your fingertips to allow the grease to penetrate the inner ring (outer ring).
Step 4: Trial run
1. Oil gas and oil mist lubrication.
In oil lubrication, the bearing temperature reaches a stable state in a short period before reaching the peak value, so the test run is relatively simple. It is recommended to maintain the speed at 2000-3000 rpm for about 30 minutes and gradually increase it to the working speed. However, when dmn (rolling element center diameter * rotation speed) exceeds the range of 1 million times, to ensure safety, the speed should be increased in units of 1000-2000 revolutions per minute.
2. Grease lubrication.
In grease lubrication, trial operation is very important to stabilize the temperature rise. During trial operation, after the rotation speed increases, the temperature rises quickly. After reaching the peak value, the temperature will slowly stabilize. It takes some time to reach stability.
3. Ball bearings.
It is recommended to use 1000-2000 rpm as the unit, and then increase the speed after the temperature stabilizes. When dmn (rolling element center diameter * rotational speed) exceeds the range of 400,000 times, for safety reasons, the speed should be increased by 500-1000 revolutions per minute.
4. Roller bearings
Compared with ball bearings, roller bearings have a longer peak temperature during commissioning and a longer time to reach a stable temperature. In addition, since the temperature may rise due to the reentry of grease and the temperature change may not be stable, the engine should be operated at the maximum speed for a long time. It is recommended to use 500-1000 rpm as the unit, and then increase the speed after the temperature reaches a stable level. When dmn (rolling element center diameter * rotational speed) exceeds the range of 300,000 times, for safety reasons, the speed should be increased in units of 300 rpm.
Step 5: Assemble the bearings
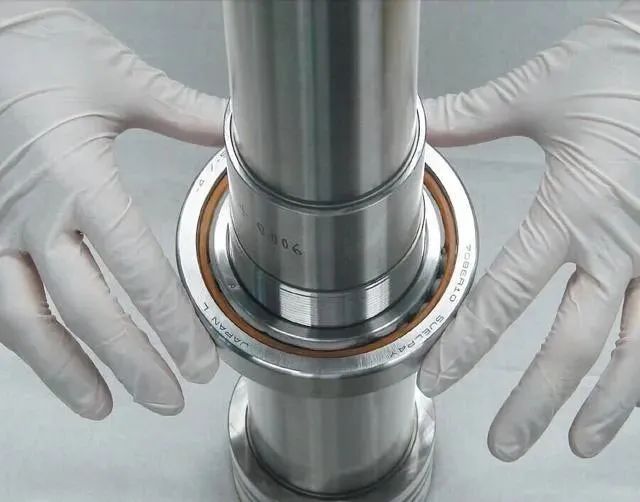
When assembling a bearing on a spindle, the inner ring of the shaft and the bearing is an interference fit (tight fit). There are usually two methods of assembly: press-in with a hydraulic press and insertion by heat fitting.
No matter which method is used, it is necessary to reduce the impact of assembly and maintain the accuracy of the bearing.
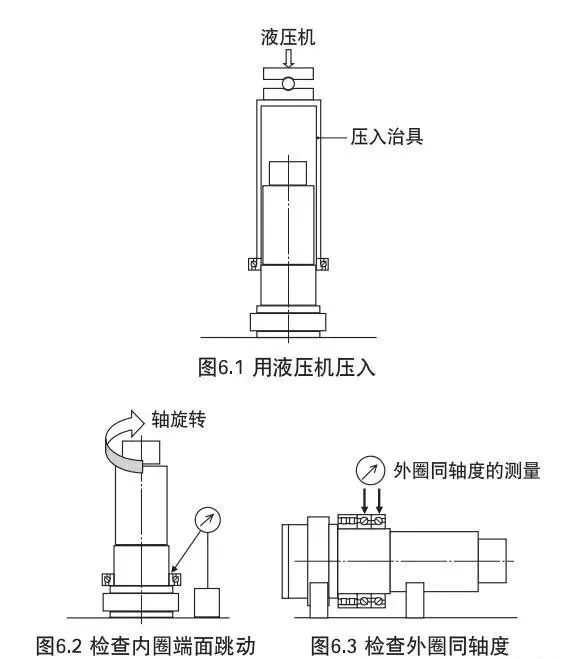
1. Press in with hydraulic press
When press-fitting a bearing using a manual press or the like, it is first necessary to calculate the press-fitting force based on the interference between the shaft and the inner ring (a hydraulic press with an operating pressure greater than the required pressure must be used).
Then, when pressing in the inner ring, use the inner ring pressing tool to firmly press it into the shaft shoulder (do not apply force to the outer ring). After pressing in, measure the accuracy of each part of the bearing to confirm whether it is indeed installed on the shaft. In addition, when using multi-row bearings in combination, the runout should be measured after assembly to correct the axis deviation between the outer rings.
2. Insertion through heating
Make full use of the reasons for thermal expansion and contraction. After the thermal expansion, the bearing is inserted. It is usually heated to 30 degrees. It should be noted that when using resin materials as the cage of angular contact ball bearings, do not heat to too high a temperature. The temperature should not be higher than 80 degrees. And due to cooling, the inner ring shrinks in the axial direction, and there will be clearance between the bearing and the shaft shoulder. Therefore, after mating, cool it down to normal temperature, and then use a hydraulic press to hold it down.
Also after cooling, please check the verticality. When heating with a bearing heater, attention should be paid to the problem of excessive temperature rise. Please use equipment with a demagnetization device that can remove residual magnetism.
Step 6: Fix the inner ring
When installing and fixing bearings on the main shaft, the inner ring side is usually tightened with a trapezoidal sleeve or precision bearing nut, and the front cover is tightened with bolts on the outer ring side. Pay attention to the following points when using a trapezoidal sleeve or precision bearing nut to tighten the inner ring.
1. Fix with a trapezoidal sleeve
In the trapezoidal sleeve, insert the sleeve that expands due to oil pressure onto the shaft, apply the required pressing force (tightening force), remove the oil pressure, and apply tightening force to the bearing while fixing the sleeve on the shaft. It is a relatively easy fixing method.
However, since the sleeve is fixed only by interference with the shaft, it may become loose when the shaft bends and is subjected to moment loads.
Therefore, in most cases, the fixing method shown in the figure below is used together with the bearing nut.
2. Tighten with precision bearing nut
When tightening precision bearing nuts (precision lock nuts), the corresponding tightening force will be given by the tightening torque management regulations of precision lock nuts.
In addition, when the bearing is fixed using a precision bearing nut, the nut may tilt due to the influence of the clearance in the threaded part, and fine adjustment may be required to achieve the rotation accuracy of the shaft.
3. The relationship between the tightening torque and tightening force of precision bearing nuts
Since the threaded surface of the precision bearing nut, the threaded surface of the shaft and the seat surface of the precision bearing nut are sliding surfaces, the relationship between torque and tightening force will also change depending on the friction coefficient during tightening, and they should be fully run-in.
It is also important to calibrate (correct) the relationship between tightening torque and tightening force in advance using load washers, etc.
At this point, the installation of the bearing has been completed. During the installation process, we should also pay attention to problems that may cause deformation of the gasket, allowance for the front cover pressure, too large or too small clearance, etc., to ensure that the installed bearing It can maintain the best operating condition and operate for a long time without failure.


Leave A Comment